Introduction
In web development it’s very common to use Chrome’s Incognito mode as a “2nd browser” so that you can sign in using different credentials or sign in to a different tenant for things like SharePoint Online or Office 365 in general. The Chrome dev tools are the best available, so Chrome is the browser of choice for performing active development on new features, as well as troubleshooting issues on existing functionality.
Problem
Because you only have “regular Chrome session” and the “Incognito Chrome session”, you wind up having to be picky about what you use these sessions for. You’ll frequently be using these two sessions to connect to your DEV environment with different sets of credentials while performing development. But then inevitably, someone will have an issue in the QA or PROD environment that you need to investigate, so you have to sign out of the DEV environment in one of your Chrome sessions and then connect to the new environment to troubleshoot (the alternative is to use Firefox or IE, but then you wind up either fighting with the inferior dev tools, or just giving up and switching to Chrome anyway).
This problem is especially egregious on O365 tenants, where you can *sometimes* sign in to multiple tenants in the same browser session, but other times it fails, and if you happen to be signed into multiple tenants and browse to a URL that isn’t tenant-scoped, such as https://portal.azure.com, it’s basically random chance which tenant will show up on the screen (or perhaps less than random chance, since it always seems to pick the wrong one whenever I accidentally do this).
Simple Solution
It turns out there’s a way to have more than just the “regular Chrome session” and “Incognito Chrome session”, in fact, Chrome supports the creation of countless sessions through the use of profiles on the browser. You may already be familiar with part of this functionality, you can sign in to Chrome with your Gmail account and it loads your profile and can also sync your browser history across devices. However, creating a separate Gmail account in order to have more sessions available to you is a hassle.
This post is going to focus on the “light” version of profiles, which does not require you to create separate Gmail accounts for each “scope” you want to create. Chrome provides the ability to add “local profiles”, intended to allow family members to share Chrome with separate browser profiles, the same way you can create multiple Netflix profiles without having to create a separate account for each user.
Here are the steps for the “simple” version of this solution:
- Click the profile image in the menu bar (just to the right of the vertical dots)

-
Select the Manage people menu item
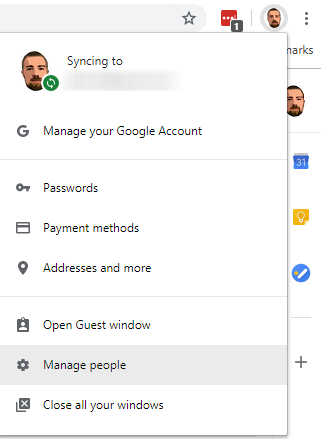
- Click the Add person button in the lower right corner
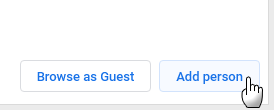
- Give the new “person” whatever name you’d like and pick an icon from the predefined list, then click the Add button

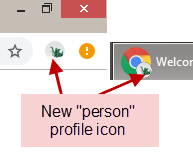
- A new browser session will open with your new “person” (notice the icon in the user profile image, as well as the icon being shown in the task bar for this session vs your other session)
And with just those simple steps, we now have a “3rd session” of Chrome available to use for whatever we want, however there are a few pain points with this “simple version”
- Each “person” has their own browser profile, which means they have their own history, bookmarks, etc. This means you may not have the URL autocomplete or bookmarks that you expect, depending on which “person” you’re using for a given task
- The icon choices we have are fairly limited… and worse still, the tiny version of these icons are almost completely unintelligible.
Read on to the “Extended Solution” to see how we’re going to resolve each of these issues.
Extended Solution
My solution to the “separate browsing history and bookmarks” is to treat that as a feature, rather than a limitation. As long as we always use the same “person” to perform the same tasks for a given tenant, we don’t need to worry about the history/bookmarks being in a “silo” relative to each user.
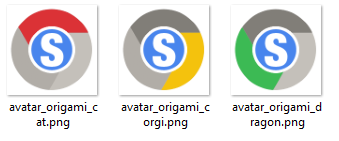
However, the 2nd problem, that of the icon selection/legibility becomes a major hurdle to this approach. Will you be able to remember whether you choose the Corgi or the Fox to represent production, and even if you can remember, can you quickly tell at a glance which of avatar icons is which?
So clearly we’re going to need to resolve the icon issue if we’re going to create meaningful separate “people” to consistently use for the same purposes.
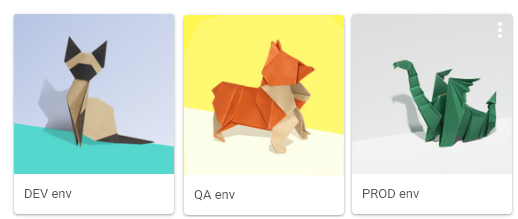
For the purposes of this example, we’re going to create 3 separate new “People”, for our 3 separate environments, following the steps in the “Simple Solution” section to create 3 new People with the following names (be sure to pick different icons for each as well, preferably your least favorite icons, since we’ll be overriding them in a future step)
- DEV env
- QA env
- PROD env
Here are the icons I chose for each account:
You can find these images in the following directory (you can simply paste this into Windows Explorer):
%USERPROFILE%\AppData\Local\Google\Chrome\User Data\Avatars
This brings us to the folder containing the images Chrome uses for each “person” avatar. These images are used when switching accounts and also displayed as the icon for the profile menu in Chrome. I recommend copying these images and edit them to the new image you want to use. (Keep note that for the “profile menu icon” Chrome crops this down to a circle, so design accordingly).
You’ll also need to create .ico icons, which will be used as the shortcut icon on the desktop/taskbar. My opinion is that these icons should match the profile avatars, so that there’s a consistent look and feel between them.
Because my “Sample Client” has 3 separate environments, I’m going to use a custom icon that’s based on the Chrome icon, where each of the 3 “edge colors” represents a specific environment. For my example “red = DEV”, “yellow = QA”, and “green = prod”, so I’ve replaced the respective avatar images in the “Avatars” folder with these files using the same names:
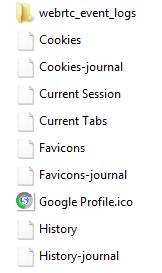
Next we’ll need to locate the profile icons by navigating to:
%USERPROFILE%\AppData\Local\Google\Chrome\User Data\
Then you’ll want to file the “Profile X” folders for each of these accounts (X will be a number, and in this example, I just created new profiles, so I know that the 3 highest numbered Profile folders are the ones I want.
Within these “Profile X” folders, there is a file named “Google Profile.ico”, which I’m going to replace in each folder with the matching .ico version of the avatar image I’ve associated with each account.
Now that we’ve made both these changes (and maybe restarted our computer), we can see the new icons in for the shortcuts:
![]()
As well as in the “Profile” menu options:
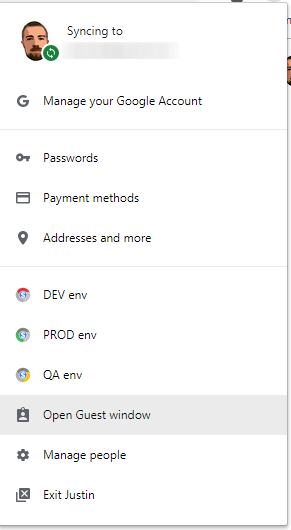
It also shows up as the icon for the profile menu:
![]()
Unfortunately, it doesn’t show our custom icon in the taskbar when the browser is open, because that icon is embedded in a Chrome DLL, so we can’t easily edit it at the moment:
![]()
However, if we change our taskbar settings (right-click a blank part of the taskbar and click Properties), we can select the Always Combine option for the “Taskbar Buttons” setting, which will collapse the labels, which causes it to load our correct custom icon instead of the Chrome icon as the “background” icon (this is true in Windows 8 at least, I haven’t tested it in Windows 10 yet):
![]()
Wrapping Up
Once you’ve got a “person” for each of your most common environments, you can begin to add the relevant bookmarks to each browser session, and the environment-specific URLs will be added to each “persons” browser history automatically.
Here are some other optional ideas:
- You can choose to “Save password” for each profile individually, since the saved passwords will only be stored with each individual profile
- You can install Chrome “themes” for each user to further differentiate which “person” you’re currently signed in with in that browser
And one last great benefit to setting this up… each of these “people” can have their own incognito session as well! That means when you need to sign into the DEV tenant with a test account, you can just open the “DEV env” browser, click the vertical 3 dot menu, and select “New incognito window” to open an incognito window that is a separate session from any incognito window you open from one of the other “profiles”.
Bonus: Icons
You can make your custom icons whatever you want, but in order to give myself (and you) a selection of ready to use icons, I created a huge collection of different “center color” custom Chrome-esque icons with the letters A-Z in the middle. You can see the “blue S” icons being used in this article (because it’s a Sample Client). I also made a “starter set” of blank versions of these different “Chrome-esque” icons, so you can add whatever custom icons you want.